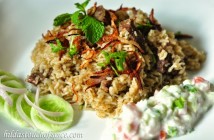
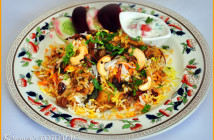
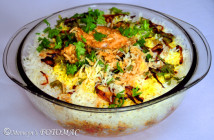
Chicken Tikkas in a Biryani taste fabulous. Whenever I make tikkas, I make sure to reserve some to make a delicious biryani. There are umpteen ways of making a good biryani but this recipe works very well for me. You may find the recipe very long but actually it is so very simple if you get yourself organized. I have explained it in detail so that you will be able to cook it with ease. All the ingredients to make this tasty biryani is available in your pantry and fridge.
I just cannot resist a good biryani. A biryani calls for a lot of aromatic spices and it is definitely a challenge to get a perfect blend and the right flavor. Excessive or too few spices and most importantly the quality and age of the rice defines the ultimate texture and flavour of the biryani.
Each time I make biryani, it is never the same. It is always refreshing and has a unique and special taste. My family always looks forward to enjoying it. Here’s my Chicken Tikka Biryani recipe for you to try out and enjoy with your friends and family.. 😀
P.S: In case you are not well versed with the conventional method of slow cooking the biryani on a tawa; you can achieve good results by microwaving it. This is what I do to make instant biryani! 😀
Ingredients :
300 gms Tandoor Chicken Tikkas / Oven Baked ChickenTikkas
For the Rice :
- 300 gms. Basmati Rice
- Salt to taste
- Water as needed
Whole Spices to be tied in a muslin cloth bundle (potli) with a long string/thread:
- 1 Black Cardamom + 3 Green Cardamoms(lightly bruised/crushed)
- ½ tsp. Shahi Jeera
- 3 Cloves
- 1 inch piece Cinnamon Stick
To prepare the Rice :
Pick, wash and soak the rice in water with the bundle of whole spices for about 20 mins. Boil the rice with a little salt and the bundle of whole spices suspended in the pot with a string until ¾ cooked. Discard the spice bundle, strain and keep it aside.
Just stir the rice twice while boiling. Do not over stir or the grains will break.Reserve the drained water. If the rice is sticky, quickly rinse in cold water to remove extra starch. Let the rice cool.
For the Biryani Gravy :
Bundle up the 7 whole spices mentioned below in a muslin cloth :
- 3 one inch pieces Cinnamon Sticks
- 4 Cloves
- 2 Bay Leaves
- 1 tbsp. Shahi Jeera (Black Cumin Seeds)
- 2 Black Cardamom (lightly bruised)
- 4 Green Cardamom (lightly bruised)
- 1 Star Anise
- ½ cup Onions (lightly golden fried until crisp & lightly crushed)
- 2 tbsps. fresh Ginger-Garlic paste
- ¼ cup fresh Tomato puree
- ½ tsp. Red Chilli pwd. or to taste
- ½ tsp. Turmeric pwd.
- 2 fresh Green Chillies (slit) (optional)
- ½ cup thick Curds/Yoghurt (lightly whisked)
- A large pinch each – Mace (Javitri) & Nutmeg (Jaiphal) pwd.
- 1 cup each fresh Coriander & Mint Leaves (chopped)
- A pinch – Sugar
- ½ cup Cooking Oil/Pure Ghee
- Salt to taste
To prepare the Gravy :
Heat oil/ghee in a sufficiently large & deep pan/dekchi/pot. Add the whole spices. Let it splutter/crackle.
Remove the fried whole spices from the oil. Let it cool.
Tie in a muslin cloth bundle/potli and set aside to be used later.
Reduce heat, add the ginger-garlic paste. Saute for a few seconds on low heat until rawness disappears.
Add tomato puree, turmeric pwd., red chilli pwd., slit green chillies and sauté on low heat till the masala is cooked and you can see specks of oil.
Add crushed fried onions, whisked curds, sugar, left over chicken tikka marinade and gravy from the cooked tikkas, if any.
Stir to mix well. Cover with a lid and cook for about 2-3 mins. or until you get a thick gravy and you see the oil/ghee separating and floating on top.
Adjust salt to taste.
Add the mace pwd., nutmeg pwd., the chopped coriander and mint leaves.
Let the gravy simmer for another 2-3 mins. In case you feel there is less gravy then you can use some of the flavored rice water which was reserved.
Switch off the flame and let the gravy rest for about 5-7 mins.
Squeeze the liquid from the muslin bundle/potli & discard.
Assembling the layers of the Tikka Biryani :
Garnishing :
- A pinch – Saffron/ Edible Food Color
- ¼ cup crisp golden fried onions
- 3 tbsps. Lemon Juice
- ½ cup Mint Leaves (chopped)
- ½ cup Coriander Leaves (chopped)
- A pinch – mix of mace, nutmeg & green cardamom pwd. (optional)
- Few drops of Kewra mixed in water (optional)
Before you start assembling…
Make sure that the cooked rice and gravy are proportionate to assemble the biryani. The gravy should be thick enough while serving. The gravy should not be too thin nor too dry. You can use an oven, a microwave or a tawa placed on the gas stove to dum the biryani so as to allow it to cook fully i.e. 100%. Remember the rice was ¾ cooked. i.e. 70%.
Here’s how you go about assembling the layers of the biryani ..
It all depends on how many layers you wish to arrange. If you wish to layer 2-3 layers then it is better to use some of the gravy in between layers. In case you prefer arranging the rice on top of the gravy then first arrange half the rice on the gravy. Spread it evenly. Place tandoori chicken pieces. Spread the remaining rice. Spread fried onions, mint, coriander leaves, a light sprinkling of a mix of mace, green cardamom & nutmeg pwd., saffron strands soaked in milk or biryani color (making sure that some of the rice remains white), lemon juice, kewra essence (optional). You can arrange a few tikkas on top if you like. Close and seal the lid tightly either with a foil or tie the dekchi with a cloth (if you intend to cook it on the gas top with a tawa). Let it simmer for about 20-25 mins. until the rice is fully cooked. You will get a good aroma after the biryani is cooked. Let the biryani rest to allow the flavors to meld for about 20 mins. before serving. Serve with your favorite raita/salad.
How to serve :
It is preferable to use a saucer/quarter plate with smooth edges to scoop the biryani to a serving bowl or individual plates to try and retain whole cooked rice grains. Lower the serving saucer from the sides of the pot, downwards.
A good way of serving is to scoop the rice separately & then the cooked masala. In this way, you will get separate layers on your plate which can be mixed by individuals as per their liking.
Tips & Suggestions :
- ¾ cooked rice means, you should be able to feel a slight grain and the rice should be quite firm when you press a grain of not fully cooked rice with your fingers.
- Do not add water to the gravy but instead you can use some chicken stock if necessary or some of the drained flavored water from the cooked rice.
- To use fresh chopped tomatoes instead of puree, first blanch, peel skin, chop and cook in the masala till soft.
- Be careful while using salt to season gravy and rice. It is always better to taste. Above all, a little seasoning goes a long way. You can always add if needed but you can never subtract or reduce if it is too much.
- Use oil/ghee as per your preference. I like to use a mix of both.
- To get a good gloss and separation of grains, I like to sprinkle a little mixture of hot oil and ghee on top of the biryani before sealing to slow cook it.
- You can use two edible colors if you like. i.e. yellow and orange. Mix the color with some water & then pour on the rice.
- Saffron strands may be used directly or you may roast is lightly, crush & use or mix with milk and use.
- Usually the proportion of chicken to rice is 1:1 but you can have your own ratio.
- Always use good quality rice, oil/ghee, fresh spices and sufficient quantity of fresh mint & coriander. This is what determines the excellent taste of a biryani.
- Some like their biryani very spicy and others like it mild. It is always better to have a perfect balance of spice to enjoy and relish great flavors of the biryani.
- Many like to avoid food color but you can use it sparingly and make sure you use good quality & graded edible/food color. For me, when I think of a biryani, it is the gorgeous color that comes to my mind. Everyone first feasts with their eyes and the aroma should be enticing. Eye & nose appeal is very important when you think of a biryani.
- Microwaving quickens the process of cooking and saves time. Baking in the oven also gives good texture. I have tried both and was happy with the texture of the biryani.
Do not worry if you have left overs. You will realize it tastes better the next day as the spices get beautifully infused in the rice!


