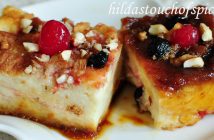
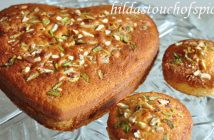
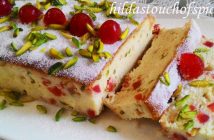
The Christmas platter is incomplete without the very special Goan Bolinhas pronounced Bolinyas. These delicious coconut cookies or biscuits are lightly crisp on the outside & soft inside. They are a heavenly tea time treat which can be enjoyed throughout the year but have a place of pride on the Christmas platter. You just have to bite into this divine cookie to experience a burst of coconut flavor! … they literally crumble & melt in your mouth. They are so simple & easy to make…
In Goa, they are baked in wood fired bakeries & the homemade ones are made in a clay oven placed on a clay stove. Besides firewood they also use dry coconut shells, leaves & charcoal to light up the fire to bake. This process is still used in Goa for baking.
When I was a child my grandmother used a clay stove & clay oven. The baking time would be eye balled & at intervals the clay lid would be opened to check if they are done. The aroma was just irresistible. Even though we use modern gadgets & ovens today, the flavor of baked goodies in clay & wood fired ovens cannot be compared.
The flavor with fresh coconut is just amazing. Almost all Goan sweets are made with fresh coconut & so you do need a knack to crack open the coconut. But even if you are not an expert you could get this done from the coconut seller.
This Christmas discover the joy of making your very own Bolinhas & believe me you would want to always have freshly baked homemade ones. Bolinhas are addictive too…once you bite into this piece of heaven you just cannot do with just a couple of them!
So pull out your baking trays, get your ingredients together & bake these authentic, traditional goodies this Christmas! 😀
Ingredients :
- 1 med. size Fresh Coconut (scraped) (only the white part)
- 250 gms. Rawa (Semolina)
- 250 gms. Sugar
- 1 tbsp. Ghee (Clarified Butter)
- 3 tbsps. Maida (Refined Flour)
- 1 level tsp. Baking Pwd.
- 3 Egg yolks
- 1 Egg White
- 10 pods Green Cardamom (skinned & freshly powdered)
- A pinch of Salt
- Water – just enough
Procedure :
First, grind the freshly scraped coconut with as little water as possible in a grinder/blender to a paste. Keep aside to be used later.
Dissolve sugar in a sufficiently large & thick bottomed pot (preferably a non-stick deep pan) & prepare a sufficiently thick sugar syrup by heating sugar on a low flame with few tablespoons of water.
Add rawa (semolina) to the syrup & stir well.
To this, then add the coconut paste, salt & ghee. Stir well to combine.
Cook till well blended & thick. Take if off the heat & let it cool completely.
Allow it to rest covered in the fridge overnight so that the rawa gets well soaked.
Remove the rested batter from the fridge & let it come to room temperature.
Then add the egg yolks & mix well.
Now, add the freshly powdered green cardamom & stir well to mix.
Sift maida with baking powder. Add a little at a time & mix till completely used up.
Beat the egg white till fluffy & add it to the bolinha batter. Give it a good mix to combine well.
Place the batter in the fridge to firm up for about 15-20 mins.
Meanwhile, prepare your baking trays by greasing with some ghee or line the trays with parchment/butter paper or aluminium foil.
It’s time to shape the bolinhas with the dough…
Dust a little maida on the rolling board. Take out the dough from the fridge & then take a small portion/ball of the dough depending on the size of the bolinha you like.
Roll the dough ball on the rolling board with dry flour & shape like you would a cutlet… round, oblong, etc.
Make them look pretty by cutting designs on the surface of the bolinha with a butter knife or a table fork or the way you like it so that they look decorative after baking them.
Shape bolinhas till you finish all the dough.
Place the bolinhas on the greased baking tray as you finish shaping them.
Make sure you place them at a distance from each other so that they do not touch & stick to each other.
Pre-heat the oven at 180C.
First bake them with only the base heat on.
After about 10-15 mins., check if the base of the bolinha is firm by moving a bolinha on the tray.
If it is cooked then switch over the mode to top heat & bake till the top gets lightly pink or slightly brown.
It is time to take it out of the oven depending on what color you like it to be.
Enjoy & serve at Christmas…


7 Comments
Never had the idea that simple coconut can be part of this kind of delicious cookies. Going to try your recipe of this Christmas. Thanks for sharing 🙂
You're welcome Rimli! Hope you had a wonderful Christmas… 🙂
Pingback: 18 Delicious Dishes from Goa You Just Cannot Miss | swagistan
Pingback: When Snowy Christmas Meets Sizzling India | Rose Alley Magazine
Hi! I really love bolinas! Thanks for your recipe. How long will they last?
Looks yummy
Thank you so much. Makes me feel so at home. Brings back loads of good ole memories preparing them with my Mum and Sister.